YI Camera Installation- A Complete Step-by-Step Guide!
In today’s modern world, security cameras and surveillance devices have become one of the efficient ways to keep an eye on your homes. The sudden rise in home burglaries and security breaches also raises the demand for security cameras. One such security device is the YI camera. With the YI Camera Installation, you can enjoy a wide range of security features, two-way audio, smart home integration, etc. If you own this security device, then you must know how to install it. For that, read this guide thoroughly!
Initiating the YI Camera Installation Process
If you have just purchased a YI security camera and are unsure about how to use it, then don’t worry. Here, we have got you covered with all the required details from unboxing to installation to pairing with the app. By the end of this guide, you will learn How To Install YI Camera effortlessly. So, have a look at the steps below to install the YI camera.
Getting Things Ready: Unboxing
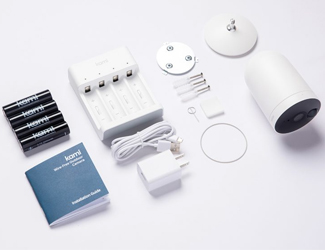
- To begin, unbox your YI security camera.
- Then, take out all the items from the box and match them with the quick installation guide.
- Ensure that you have received a YI Home security camera unit, a USB-Micro power adapter, a mounting plate, and a manual.
- Now, prepare the required things such as an active internet connection, USB cable, screws, SD Card, etc.
Mounting the Camera
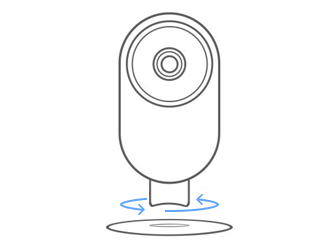
- After that, select a suitable location to place your camera.
- Now, select the type of mount depending on your intended place.
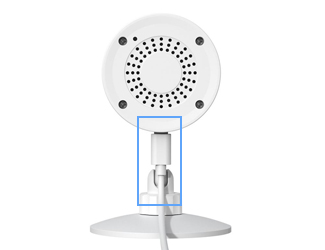
- For the wall mount, first mark the holes with a pencil on the wall.
- Then, ensure the camera is within the reach of the power source/electrical outlet.
- Now, drill the holes to attach the mounting plate to the chosen location.
- Use the included screws and wall anchors to place the mount base on the wall.
- Afterward, tighten the screws and check the wall mount is securely attached.
- Check the camera angle, field of view, and positioning.
- Moreover, place the camera away from direct sunlight, distractions, physical barriers, etc.
Power Supply & Connecting the Camera
- Initially, take the included power adapter and USB cable.
- Now, insert the one USB end into the camera.
- Then, connect the other end of the cable to the power adapter.
- Further, plug the power adapter into the electrical outlet or a power strip.
- Then, press the power button on the camera, if it has one.
- Wait for the blinking blue light on the camera, indicating it is ready to set up.
Configuring the Camera
- Now, ensure the camera has a sufficient power supply.
- After that, connect your computer to the existing home network.
- Further, install the YI Home app on your smartphone.
- Then, create an account or directly log in using valid login credentials.
- Next, add your device to the app and follow the further instructions.
- Now, you can adjust the camera settings, as per your preferences.
- Finally, the YI Camera Installation is finished.
Bottom Line
Overall, this quick guide represents the simple yet easy-to-follow steps of the YI Camera Installation. From the device unboxing to the camera connectivity, this guide covers all you need to know about this process. Hopefully, you are now able to optimize your home security experience following this succinct guide.
Recent Post